Well, technically last weekend was the first weekend of Spring, but this weekend it actually felt like it. We meandered into the low 60s and the sun was out all weekend.
Yesterday we made our annual pilgrimage to see the cherry blossom trees in bloom at the Washington Park Arboretum:
Cherry Blossoms on Mossy Branch by *dbvictoria on deviantART
Buds and Blooms by *dbvictoria on deviantART
There was a bit of bird watching as well:
Mated ducks by *dbvictoria on deviantART
Robin by *dbvictoria on deviantART
The munchkin was delighted with all the blooms:
More pictures here!
This was also the first weekend I haven't been at Norwescon for Easter since 1999. There was lots of yardwork done instead, and I whipped up a tasty Easter dinner:
And dessert. Because everybody loves a parfait!
Sunday, March 31, 2013
Friday, March 29, 2013
Friday Favorites
I've been out of the habit of doing these for quite some time. Let's see if I can keep them going for a bit again.
Golden Aquamarine, by VickiDianeDesigns:
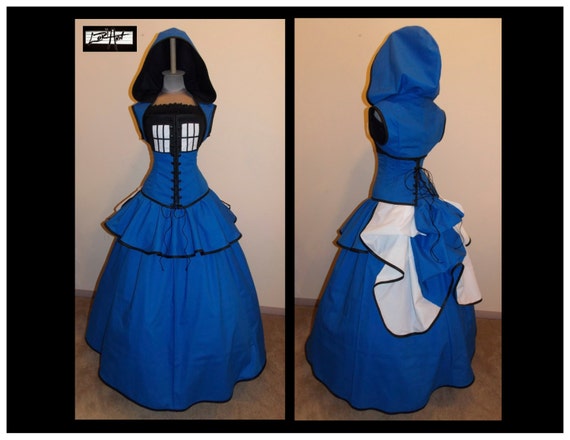
TARDIS - Blue, Black, and White Full Bustle Gown Costume, by lorian37:
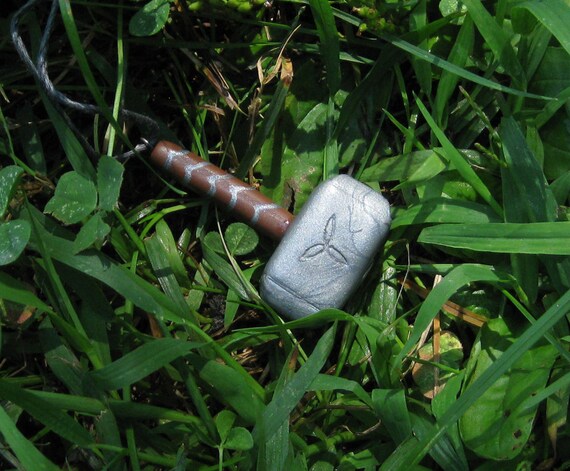
Thor's Hammer - Mjolnir - Necklace - Avengers Jewelry, by EldritchArts:
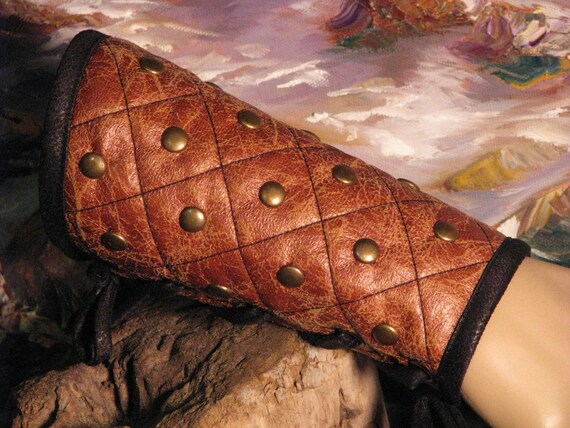
Medieval Renaissance Studded Arm Bracers Corset Lacing Style, by CurvyWench:
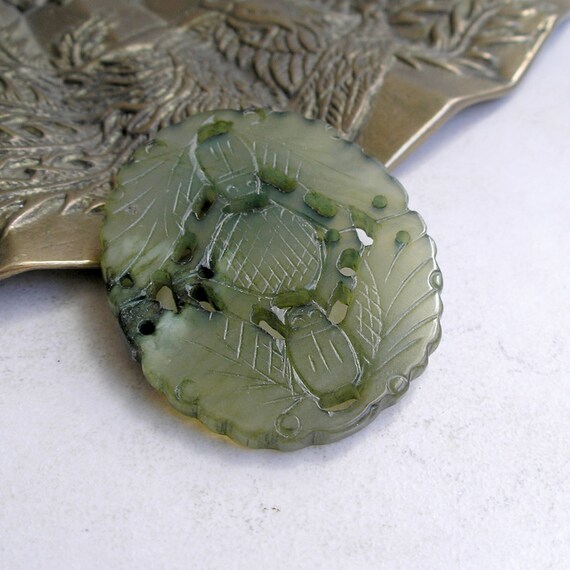
Green Carved Stone Pendant Featuring Two Bats, from ForetTwo:
~
Tuesday, March 19, 2013
Proofing my tools
I just completed a special order, turning a fossil into a pendant on a necklace. Pictures of the finished piece will have to wait until I get approval from the commissioner, but I can talk about the process at least. This was a fossil created by permineralization, where the organic materials are replaced over time by minerals. In this case, the mineral was a silicate and the piece was now basically agate. An agate has a hardness of about 7-7.5 on the Mohs scale. SCIENCE!
In wrapping quartz crystals previously, I'd scratched the surface with the metal pliers I use, and I wanted to make sure this didn't happen, as the fossil I was working with was stunningly beautiful and also, well, not mine, so if I messed it up? Whoo boy!
Stores do sell special pliers with plastic tips that pop on, but I've tried them and thought they were pretty much rubbish. So I went to the hardware store and came home with a tin of Plastidip. There's both a spray and a dip variety available, and I got the dip.
I have one pair of round-nose pliers that I've used to death. The spring clips have fallen out of the handle, and I've actually put a crease in the metal, so these were my experimental guinea pigs. I did two dips, with a half hour period in between them, as per the directions. These directions also state to let the tool dry for 4 hours before using. I actually let them sit for 2-3 days because I got distracted by other things, but that couldn't have hurt anything! It worked beautifully, holding up to the wire while not marring the surface of the piece.
The dimples in the metal actually filled in with the dip. It'll be interesting to see how they hold up, although they'll be used only for detail work from now on and not in regular use for loop making, as the diameter is much wider now.
I'm now thinking the next use for the dip will be the tips of the wings I refurbished a few weeks ago.
~
Saturday, March 16, 2013
Trenchcoat to Tailcoat conversion
Years ago I came across an old leather trenchcoat from the 1970s at a thrift store for a dollar. It was a lot like this one to start out, except this coat is mint and the one I found was far from:
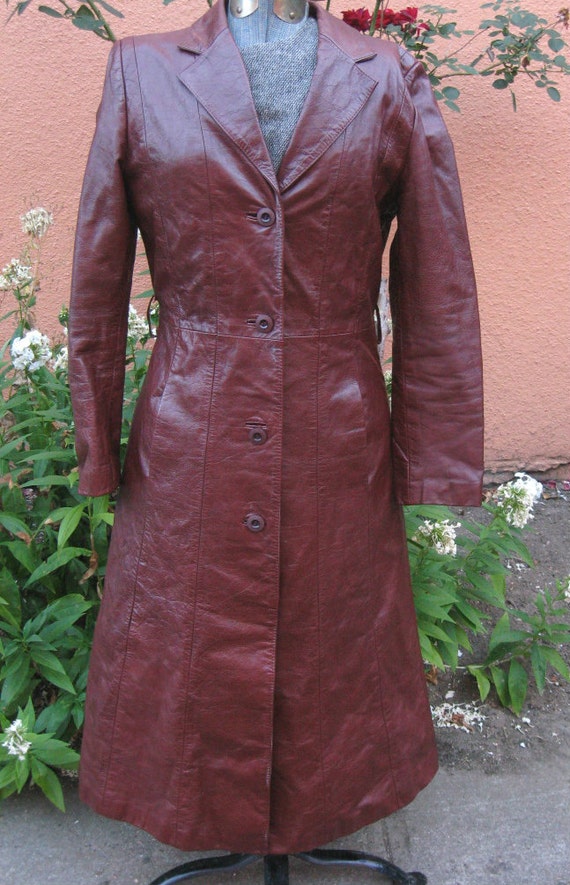
There is some wear to the leather, especially around the neck, the button holes are sprung, and there was a tear in the leather under the third button in the front. The sleeves were also almost 2" too short for me. But I loved the leather, and the fit, and the price was right, so I bought it and squirreled it away for inspiration to strike.
A couple of years ago I started working on it, pulling the seams at the waistline and along the side hems, giving me the shape I wanted:
And then it sat in a bin in my basement for almost 2 years, waiting for me to figure out what I wanted to do next. Then in a trip to my favorite fabric store this week, I found exactly the right lace and trim to finish the job:
That's 2 yards of an 18" wide Venise lace in matte gold and black, some gold and burgundy trim, and an ivory lace with gold sequins.
I cut apart the lace into the shapes I wanted for the corners of the tails, and used spray adhesive to hold it in place while I hand sewed it down:
I also added some lacework detail across the shoulders:
For the sleeves, I made cuffs out of the leather I'd cut away from the front of the jacket, with more of the lace:
Altogether, it was about 8 hours of hand sewing for the lace, but it's not going anywhere now. Once the lace was in place, I machine-sewed the gold/burgundy trim from one corner of the front cutaway all around the edges of the jacket and cuffs. On the edges of the sleeve cuffs I also added the sequined lace:
Here's a closeup of the sleeve cuff:
And the applique on the coat tail:
I replaced the original buttons with some brass ones, and added chain closures as it became a bit too tight for me in the years it sat in the bin in the basement:
Full back view:
After looking at this picture, I decided the back still needed something, so I cut out two more flowers from the lace and added them to the buttons on back:
I'm thinking now that I'll use the rest of the chain for a drape here as well.
And here it is on:
Here's the pants I'm wearing, a pair of thrift store stretchy corduroys that I slit up the side and added grommet tape to:
(For the curious, my tophat came from Bernie Utz in Seattle and the pearl hatband was made by the lovely ladies from Aurora Illusionary Travel Emporium )
Looking forward to finding many excuses to wear this coat again now!
~
There is some wear to the leather, especially around the neck, the button holes are sprung, and there was a tear in the leather under the third button in the front. The sleeves were also almost 2" too short for me. But I loved the leather, and the fit, and the price was right, so I bought it and squirreled it away for inspiration to strike.
A couple of years ago I started working on it, pulling the seams at the waistline and along the side hems, giving me the shape I wanted:
And then it sat in a bin in my basement for almost 2 years, waiting for me to figure out what I wanted to do next. Then in a trip to my favorite fabric store this week, I found exactly the right lace and trim to finish the job:
That's 2 yards of an 18" wide Venise lace in matte gold and black, some gold and burgundy trim, and an ivory lace with gold sequins.
I cut apart the lace into the shapes I wanted for the corners of the tails, and used spray adhesive to hold it in place while I hand sewed it down:
I also added some lacework detail across the shoulders:
For the sleeves, I made cuffs out of the leather I'd cut away from the front of the jacket, with more of the lace:
Altogether, it was about 8 hours of hand sewing for the lace, but it's not going anywhere now. Once the lace was in place, I machine-sewed the gold/burgundy trim from one corner of the front cutaway all around the edges of the jacket and cuffs. On the edges of the sleeve cuffs I also added the sequined lace:
Here's a closeup of the sleeve cuff:
And the applique on the coat tail:
I replaced the original buttons with some brass ones, and added chain closures as it became a bit too tight for me in the years it sat in the bin in the basement:
Full back view:
After looking at this picture, I decided the back still needed something, so I cut out two more flowers from the lace and added them to the buttons on back:
I'm thinking now that I'll use the rest of the chain for a drape here as well.
And here it is on:
Here's the pants I'm wearing, a pair of thrift store stretchy corduroys that I slit up the side and added grommet tape to:
(For the curious, my tophat came from Bernie Utz in Seattle and the pearl hatband was made by the lovely ladies from Aurora Illusionary Travel Emporium )
Looking forward to finding many excuses to wear this coat again now!
~
Saturday, March 9, 2013
Vintage, vintage, who's got the vintage?
I have a gallon-sized bag of vintage jewelry that I'm slowly photographing and listing. I keep telling myself I won't buy anything else until I get through this, and I'm mostly keeping to it. I've added 20 new pieces to Miss Victoria's Vintage this week. Here's a few of my favorites:
Vintage Military Eagle Buttons in Brass 7 Buttons 2 Hat Fasteners
Pair of Vintage Stickpins - Jade and Opal in Brass 1980s
Vintage or Antique Mother of Pearl Oblong Clip 1940s
Vintage Choker Necklace Silver with Faux Pearls and Rhinestones 1950s
~
Vintage Military Eagle Buttons in Brass 7 Buttons 2 Hat Fasteners
Pair of Vintage Stickpins - Jade and Opal in Brass 1980s
Vintage or Antique Mother of Pearl Oblong Clip 1940s
Vintage Choker Necklace Silver with Faux Pearls and Rhinestones 1950s
~
Sunday, March 3, 2013
A day at a con
This weekend was Emerald City ComiCon and we spent today wandering around, seeing the fantastic sights.
Here's a few of the highlights of the day:
I managed to take more shots of Legos than people this year, it seems. Full set of pictures is here.
~
Here's a few of the highlights of the day:
I managed to take more shots of Legos than people this year, it seems. Full set of pictures is here.
~
Subscribe to:
Posts (Atom)