Well, done with the retaining wall project, at least for this year.
How I started:
And how it stands today:
The biggest stumbling block, and what I've been workion on since my last post, was the removal of the stump from the old holly tree. I got that out yesterday, finally:
I now have 7 black orchids and 12 burgundy tulips planted, and will be waiting for spring with even more anticipation than usual.
...
Sunday, October 5, 2014
Sunday, September 21, 2014
The landscaping project, part II
Part I here:
We can haz wall?
This is how the yard looked when we started today:
We made an excursion to Home Depot, buying 900 pounds of sand:
Then we finished smoothing out some bumps in the trench and made a beach strip with the sand:
(Guest blog appearance by the husband!)
The first row was the hardest. We ended up with a bit of a wavy line because of how the yard is shaped, but I like curves.
Second row went in easy-peasy:
The rock pile that we accumulated while digging the trench was great filler behind the bricks.
I could never have managed the heavy lifting by myself.
Third and fourth rows were even easier:
We still need some more gravel for fill, and then will shovel some of the dirt back in and level things off. Once we've got the filling done, we'll see if we should add a fifth row. But the hardest of the work is done! Hooray!
....
Friday, September 19, 2014
A fairy tale
There once was a great and magical forest, and all the
animals and mankind lived together in peace beneath its boughs for
centuries. Then, one dark day, a dragon
came and made her home in the center of the forest, and the peace was shattered
as she laid claim to everything green for as far as she could fly in a day. Many a champion tried to drive the dragon
from the forest, and met their doom beneath her claws and teeth, so finally a
great wizard came to the woods. He knew
what it would take for him to conquer the mighty lizard, but paid the price
without complaint. There was no battle,
just the casting of a single spell, and now the forest stands safe for as long
as the wizard too stands.
Monday, August 25, 2014
The landscaping project
Business has been slow. I'd blame it on the fact that I haven't been promoting, but it was slow when I was doing a lot of promoting, and I got tired of wasting time and energy. So, time to put that creative force into something else!
Our house is on the side of a steep hill. How steep is it, you ask? Well, when we have a good snowstorm, the city puts up barricades at the top and bottom instead of plowing, if that gives you any idea, and when I had my minivan I'd have to get the front brakes replaced every couple of years.
What that means for our house is that you walk in the front door, go through the living room into the dining room and go out the French doors there, you find yourself on our deck, which is a good 8-10 feet over the back yard. If you go into the basement, there are two windows that overlook the street on the North side and from the back we look like a 2-story house. Then, when you go along the fence line dividing ours from our neighbor's property, you find yourself going downhill and when you end up in the back section of our yard you find yourself staring at a rock wall and a back yard that's now about 8-10 feet above street level.
Along this rock wall is a dirt slope that up until 2 years ago was completely taken over by a holly tree. I took that down to the stump, and last winter I pruned the pear tree on the corner that we hadn't touched in over a decade. And then this spring, I got the wild idea that I wanted to turn this area into an iris bed. I found some lovely black irises, which I proceeded to purchase, and now I've got to get this part of our property fit to plant.
Here's a panoramic view of the area in question before I started:
And a side view:
There's still a couple of areas that aren't quite clear yet, but I need to get this going as I'm running out of planting time.
That second picture is of the front corner, and a giant thistle grew up in everything else there. I missed getting a picture of it when it was in bloom, but it's still pretty nifty looking in its going to seed phase:
Thistle Gone To Seed 2 by dbvictoria on deviantART
Here's a sad diagram I did in Photoshop of my grand plan:
Here's how you build a retaining wall.
My husband is also redoing the upper part of the back yard. He just completed a new fence yesterday and this evening he'll start clearing the area where he wants to put a fire pit. We did the math on how many retaining wall bricks I needed and how many he needed, added another 20% on top of that, and the lovely folks at Lowe's delivered two pallets yesterday morning.
Part of the clearing included breaking up all the branches from the holly and pine trees, which will be used in the christening of the fire pit.
I'm in the "dig a trench" phase now, which is step 2 of part 1. (Part 1 Step 1 was to make a string line. That's the only part of this entire process that didn't involve sweating.) It's a good 30 along this section, and I'm about 8' in as of this morning. I started out having to dig in only ~14" because the back corner is flatter, but I'm up to ~24" in width now because the creep is increasing as I get out towards the street. There's also the stump of the now officially titled Evil Holly Tree, and its roots.
Day 1 (yesterday) trench progress:
And so far today:
I had to dig in a big further because of that root thing. This time it's not the fault of my being straight-line challenged. (Yes, this time.)
It's now getting into the hot part of the day, so I'm breaking until about 4 in the afternoon, then going out for some more torture, I mean digging. I hope to have the trench finished by tomorrow evening, and the husband hopes to have the firepit completed by tomorrow evening. I hope he finishes too, because then I can wheedle him into helping me, but the firepit comes first because we hope to premiere it for our birthday party next weekend. (His birthday was actually Thursday, and mine is today.)
Oh, and if you'd told me 20 years ago that I'd be doing yardwork and landscaping on my birthday, I'd have suggested you go get yourselves committed. How times change.
...
Tuesday, July 15, 2014

Saturday, July 12, 2014
Bathtime!
We went out to Saltwater State Park this morning, and the tide was out, which meant lots of tide pools, lots of squirting clams, and lots and lots of stinky slimy piles of seaweed. We ended up with a stinky, slimy dog, so when we got home there was bathtime.
...
...
Saturday, July 5, 2014
Silly cat post
Our 10 month old cat, who is already bigger than any cat I've ever owned, has a new cat tree, and a new toy to go with it:
Brass Screw Confederacy, 2014
The Brass Screw Confederacy is a Steampunk weekend in scenic Port Townsend, WA. I was originally booked to vend at another event this weekend, but after a change of plans I headed out with my camera to play tourist. This seems to be the year for that!
The full album is here, and here's a few of my favorites from it:
bonus ladybug!
.
The full album is here, and here's a few of my favorites from it:
bonus ladybug!
.
Monday, June 30, 2014
This shop and blog are Hobby Lobby free
Because a corporation's religion doesn't belong in my uterus. Please feel free to use and share these images!
Thursday, May 8, 2014
Bathroom remodel
My husband replaced the shower stall in our bathroom sometime in the last 1-3 years (I've completely lost track of time for all the various projects that are in progress nowadays). Well, this week he finally finished it, courtesy of our attempts to get our home refinanced and the appraiser shaking his finger at us.
Here's what it looked like a week ago:
and here's what it looks like now:
The paint shade is "paprika" and it's what we used in the kitchen when we got that redone about 5 years ago. The edging around the shower is sheets of molded plastic that you cut to shape.
We still need to add some crown molding along the ceiling/wall juncture, and we're planning on hanging a big mirror on the back wall above the towel rack, but that's just window dressing.
There's more pictures here.
Tuesday, May 6, 2014
My birthday came early this year
Ever since my beloved old Nikon bit the dirt and I replaced it with my current Canon, I've been horribly missing the macro function the Nikon had, that the Canon needed a separate lens for. I put it on my Amazon wish list and forgot about it for awhile. When I went back and looked a couple of years later, it had doubled in price. I put it on the back burner again, and the next time I checked it had gone up another $200. Bummer. But last week, when I checked, I found a factory refurbished lens for almost half the current retail price for a new one. It was still $150 more than it would have been if I'd just bought the silly thing when I first got the camera, of course, but that's water under the bridge now. I shouldn't really have bought it, not when we just paid the taxman and car insurance last month, but if I'd let it go I would totally be kicking myself for months.
So here it is:
Previously I've been taking large pictures as close as the stock lens would allow, and then cropping images down in Photoshop. No more!
Here's a couple of comparison shots between my stock lens and my new baby:
I'm going to have to play around with the depth of focus for a bit, obviously, but that won't be a hardship.
Off to go play now....
.
Wednesday, April 23, 2014
Pandora's hat box
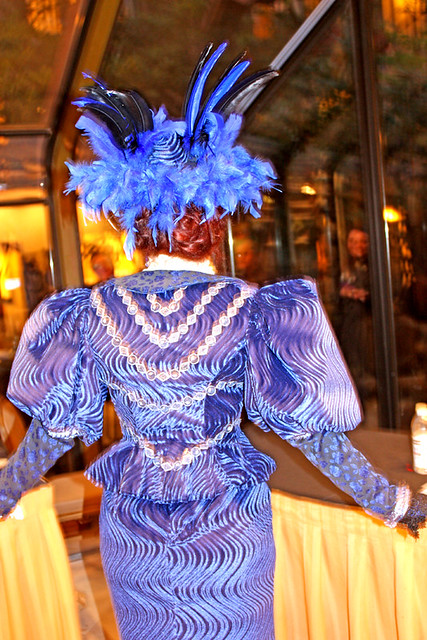
I was a part of a huge group presentation for this year's Masquerade. The theme was Pandora's hat box, and we based our silhouettes off of clothing styles from the 1890s-1910s, although historical accuracy wasn't a big deal for us. Pandora opened the hatbox and released the following evils: gossip, lust, greed, pests, plague, pollution, misery, jealousy, and death.
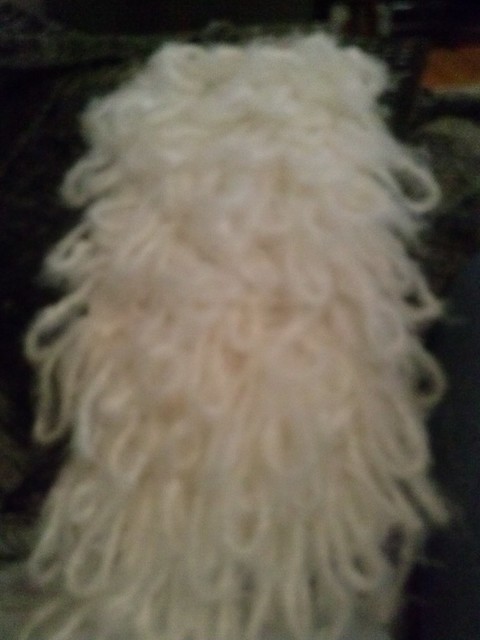
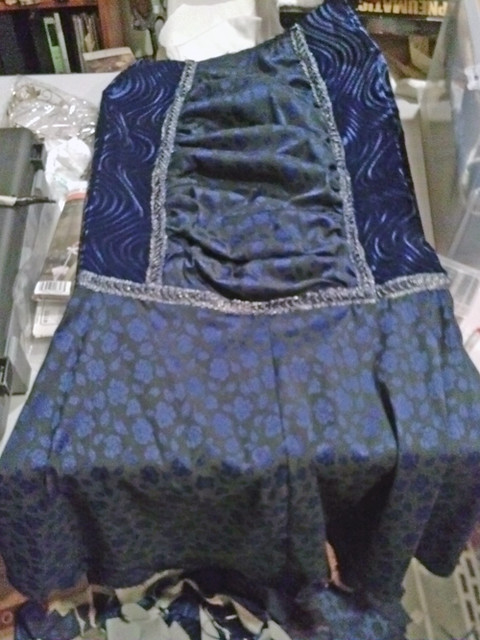
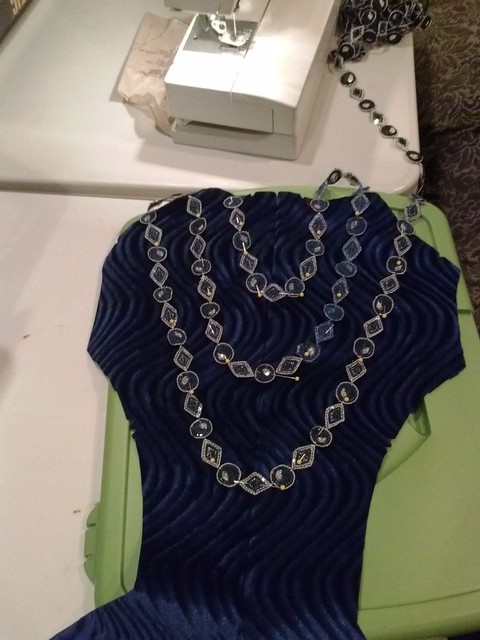
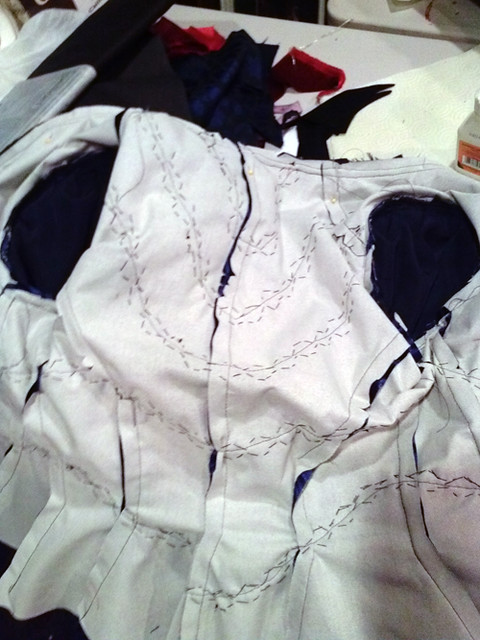
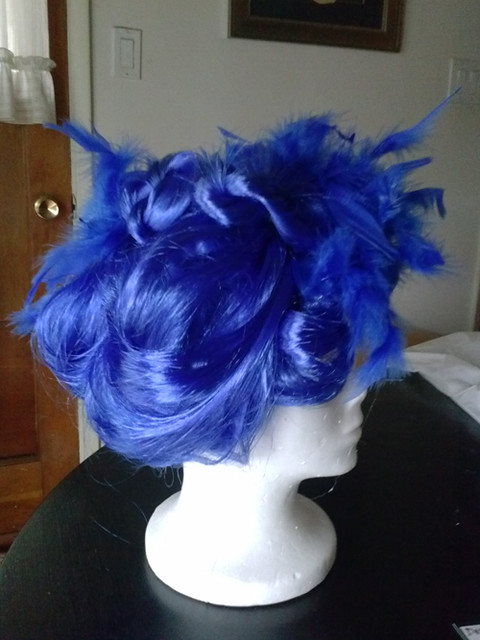
I picked Lust as my evil. Lust is represented traditionally by the color blue and the goat. With the goat, I of course had to go with gigot sleeves, and I picked a hobble skirt pattern for the va va voom factor. I found an incredible patterned upholstery velvet and some black and blue satin brocade. To represent the goat, I made a "beard", a cravat with some angora wool, and added horns to my hat.
(I just realized i haven't taken any good pictures of the hat! I'll have to remedy that.)
The skirt has a ruched panel in the front of the contrast fabric. I found two incredible blue metallic trims to go with the outfit, and used one of them to outline the skirt and another around the hem.
The trim was laid out on the back and tacked down with my sewing machine, but then I had to hand-sew all along the edges to keep it from curling up.
Here's the finished outfit with the hat:
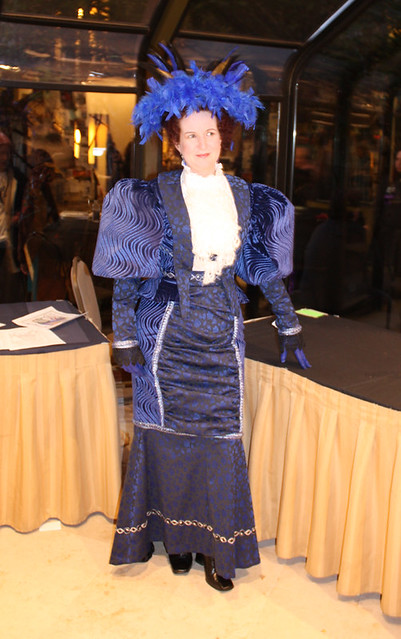

I actually took about 6" out of the sleeves, believe it or not!
Unfortunately we didn't get a picture of all 10 of us together. Here's me with gossip and greed:


Our group won Best Use of Theme, which was Elegance and Entropy. My first Masquerade award!
Planning ahead - I'd realized that this outfit had potential,and put together a custom wig to represent District 1 for the Hunger Games.
With different makeup and a lace cravat:


Very much looking forward to getting a lot more wear out of this, as I love the color and for once the outfit turned out exactly as I'd pictured it in my head.
I picked Lust as my evil. Lust is represented traditionally by the color blue and the goat. With the goat, I of course had to go with gigot sleeves, and I picked a hobble skirt pattern for the va va voom factor. I found an incredible patterned upholstery velvet and some black and blue satin brocade. To represent the goat, I made a "beard", a cravat with some angora wool, and added horns to my hat.
(I just realized i haven't taken any good pictures of the hat! I'll have to remedy that.)
The skirt has a ruched panel in the front of the contrast fabric. I found two incredible blue metallic trims to go with the outfit, and used one of them to outline the skirt and another around the hem.
The trim was laid out on the back and tacked down with my sewing machine, but then I had to hand-sew all along the edges to keep it from curling up.
Here's the finished outfit with the hat:
I actually took about 6" out of the sleeves, believe it or not!
Unfortunately we didn't get a picture of all 10 of us together. Here's me with gossip and greed:
Our group won Best Use of Theme, which was Elegance and Entropy. My first Masquerade award!
Planning ahead - I'd realized that this outfit had potential,and put together a custom wig to represent District 1 for the Hunger Games.
With different makeup and a lace cravat:
Very much looking forward to getting a lot more wear out of this, as I love the color and for once the outfit turned out exactly as I'd pictured it in my head.
Wednesday, April 2, 2014
Cherry blossom time
A spring tradition, going to see the cherry blossoms at the Washington Park Arboretum. Here's a few of this year's pictures:
Cherry blossoms by dbvictoria on deviantART
I ended up spending a lot of time looking at tree trunks and branches this year, it seems.
Mossy tree by dbvictoria on deviantART
Moss on red birch by dbvictoria on deviantART
The full set is here.
...
Cherry blossoms by dbvictoria on deviantART
I ended up spending a lot of time looking at tree trunks and branches this year, it seems.
Mossy tree by dbvictoria on deviantART
Moss on red birch by dbvictoria on deviantART
The full set is here.
...
Monday, March 31, 2014
Emerald City Comicon, 2014
Photos here. We didn't have any money to spend this year, which made me whimper when we were at the Blonde Swan booth, and Fez-o-Rama.
We were only there for three and a half hours, but we were totally wiped. We got stuck in a shoulder-to-shoulder crowd in one of the aisles. Hadn't felt like that since I stopped hitting Bourbon Street during Mardi Gras back in ye olde college daze! If that's what a Sunday afternoon is like, I don't want to imagine a Saturday.
My entire costume collection is currently piled in a giant heap in the spare bedroom, so I defaulted to a variant of the outfit I wore for the Steamcon wake last weekend, switching out the corset.
A bunch of the husband's coworkers dressed up as various superheroes. I missed my chance to one of them coworker crossdressing as classic Supergirl, but here's Nightwing and Batgirl:
And one more fantastic WWII Captain America:
The best outfit all day, of which I didn't get a picture because it was someone else's wee one, was a little girl dressed up in a bright yellow generic superhero bodysuit with a shiny red cape. When the husband asked who she was supposed to be, she said "Super Red Riding Hood!"
Saturday, March 1, 2014
Pie night!
It's embarrassing how long it's been since I've updated here. Bad Victoria. But I got pie anyways. I went to a pie night tonight, and got to visit with folks I don't see hardly often enough AND stuff my face with tasty food. Win and win again.
These pie nights have been occurring for 12 years, I was told. I hope to attend many more. There are themes sometimes, and tonight's was "The Pie Night That Should Not Be," which meant we all made pies that were odd combinations of ingredients or just outright odd. The winner of the night was the chocolate bacon bourbon pecan pie. There was grape pie and avocado and carmelized onion pie with green olives and hair pie and taco pie and mock apple pie and strawberry lemonade pie and a bunch of others I am forgetting. There were more than 20 but less than 30 pies.
Before (not all pies had arrived when I took this shot):
After:
My contribution was a chili chocolate custard pie with cinnamon chocolate cookie crust and cinnamon whipped cream.
I started with this recipe here, and made a few adjustments along the way.
I went to three groceries and couldn't find cinnamon extract, so I improvised:
I dissolved 2 cinnamon candies in 1 shot of 100-proof vodka and whipped that into the cream.
I am now going to succumb to pie coma. G'night!
.
These pie nights have been occurring for 12 years, I was told. I hope to attend many more. There are themes sometimes, and tonight's was "The Pie Night That Should Not Be," which meant we all made pies that were odd combinations of ingredients or just outright odd. The winner of the night was the chocolate bacon bourbon pecan pie. There was grape pie and avocado and carmelized onion pie with green olives and hair pie and taco pie and mock apple pie and strawberry lemonade pie and a bunch of others I am forgetting. There were more than 20 but less than 30 pies.
Before (not all pies had arrived when I took this shot):
After:
My contribution was a chili chocolate custard pie with cinnamon chocolate cookie crust and cinnamon whipped cream.
I started with this recipe here, and made a few adjustments along the way.
Chili Chocolate Custard Pie
Sugar cookie crust:
Ingredients:
1/2 cup (1 stick) butter, softened
1/2 cup sugar
1 egg
Another 1/2 cup sugar
1 teaspoon vanilla extract
1 3/4 cup all-purpose flour
2 tablespoons cocoa powder
1 teaspoon cinnamon
1 teaspoon baking powder
2 tablespoons heavy or whipping cream
1) Cream together butter and first amount of sugar with a mixer.
2) Add egg, the other 1/2 cup sugar, and vanilla. Mix well. Scrape down sides of bowl as necessary.
3) Add flour, baking powder, cocoa, cinnamon and cream, and mix until the dough comes together into crumbly little bits.
4) Form the dough into a disk about 4 inches in diameter.
5) Chill in refrigerator for at least one hour.
Crust Directions:
1) Preheat oven to 350 F.
2) Roll dough to about 1/8 inch thickness.
3) Place in a pie plate (9 to 10 inches in diameter). Use your fingers to press it into the plate.
4) Trim off any excess dough so that there is about 1 inch of overhang all the way around.
5) Use your fingers to roll the overhanging dough onto the edge of the pie plate, and then crimp.
6) Use a fork to poke small holes all over the bottom and sides of the dough.
7) Place a sheet of parchment over the dough, and fill with pie weights or dry beans.
8) Bake for about 20 minutes at 350 F, or until the edges are golden brown and lacy.
9) Remove parchment and weights, and bake for another 5-8 minutes until the bottom is brown and delicious looking.
10) Remove from oven and cool to room temperature on a wire rack. You can turn off the oven, you won't need it again in this recipe.
Chili Chocolate Custard Pie Filling
Ingredients:
10 ounces bittersweet chocolate chips (I used Guittard dark 60% cocoa)
5 egg yolks
5 tablespoons sugar
1/4 teaspoon salt
1 1/2 cups heavy or whipping cream
3/4 cup half-and-half
1 tablespoon vanilla extract
1 teaspoon chili powder
Custard Directions:
1) Put chocolate chips in a large bowl with a sieve or fine strainer set over it (it's okay if the strainer is touching the chocolate).
2) Combine egg yolks, sugar, and salt in a medium saucepan, and whisk well.
3) Add cream, chili powder and half-and-half, and, stirring often, bring to 175-180 F on an instant read or candy thermometer over medium to medium-high heat. (If you don't have a thermometer, dip a wooden spoon in the mixture and draw your finger across the back. If it leaves a clear path, it's done.)
4) Pour hot cream mixture through strainer onto chocolate. Let sit 1-2 minutes to melt.
5) Stir well to combine, let sit 5 minutes.
6) Add vanilla and mix well.
7) Pour into cooled pie shell. Tap pie plate gently against the counter to even the filling out and pop any bubbles.
8) Chill in refrigerator for at least 4 hours, and up to 72. Do not cover the pie, or the crust will get soggy.
Whipped topping
Ingredients
1 cup heavy or whipping cream
1 tablespoon sugar
1 teaspoon cinnamon extract
1) Combine cream and sugar in a mixer. If you don't have a mixer, just put it in a bowl and use a hand whisk.
2) Whip on medium speed until frothy, then increase to high and whip the cream to medium-stiff peaks.
3) Decorate!
I went to three groceries and couldn't find cinnamon extract, so I improvised:
I dissolved 2 cinnamon candies in 1 shot of 100-proof vodka and whipped that into the cream.
I am now going to succumb to pie coma. G'night!
.
Subscribe to:
Posts (Atom)