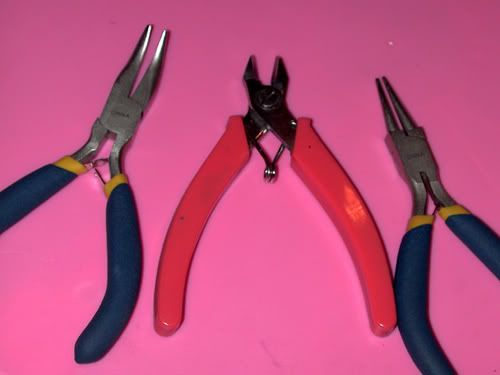
Tools needed:
Round-tipped pliers
Bent angle tip pliers
Wire cutters
Supplies needed:
Wire – half-hard, 24-gauge is my preferred (you can use any gauge you want, but get much bigger than 24 and you'll have trouble finding beads drilled wide enough to fit on the wire) I advise you to start with base metal, not precious (copper or brass or nickel instead of sterling or gold). Note - the smaller the number, the bigger the gauge, or thickness, of the wire. 20 gauge is much larger in diameter than 24 gauge.
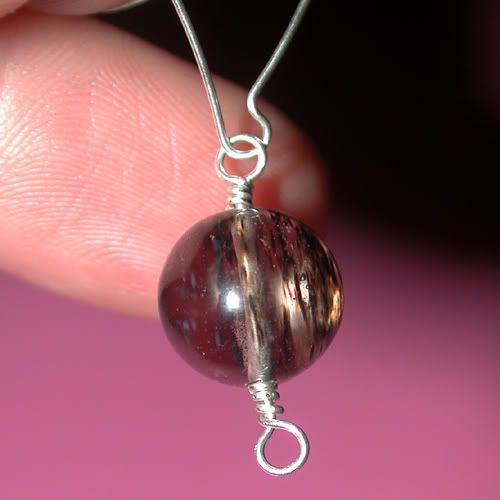
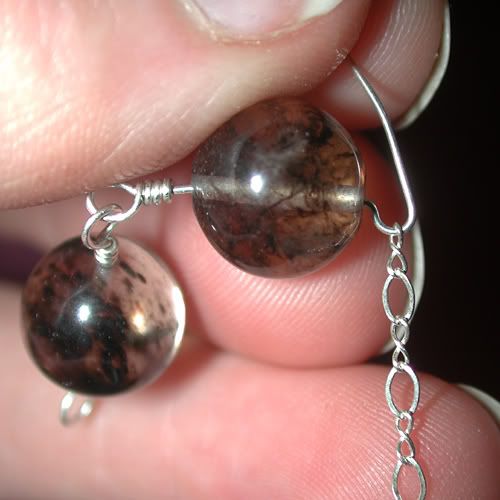
Drilled beads

Method:
1. Grip the wire with the round-tipped pliers approximately ¼” from the end. Bend at a 90 degree angle.
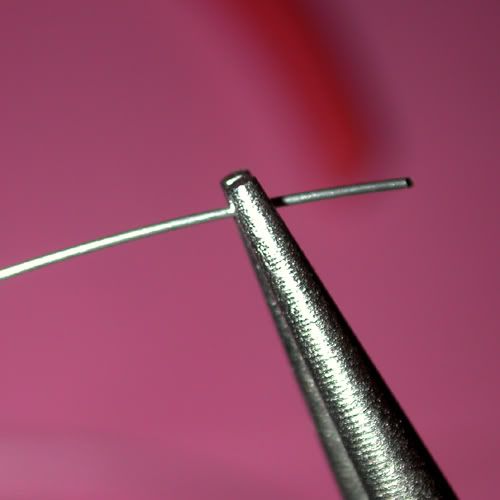
2. Wrap the wire around the bottom prong of the pliers, forming a loop
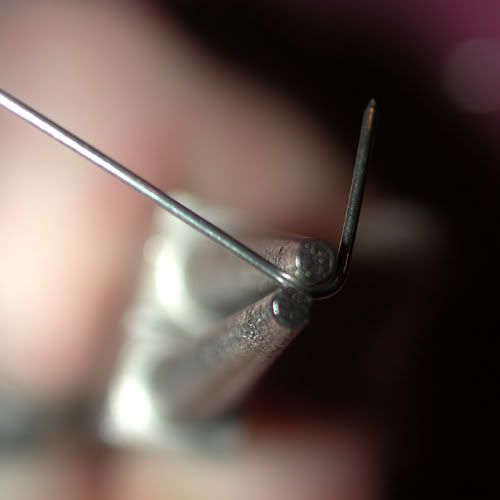
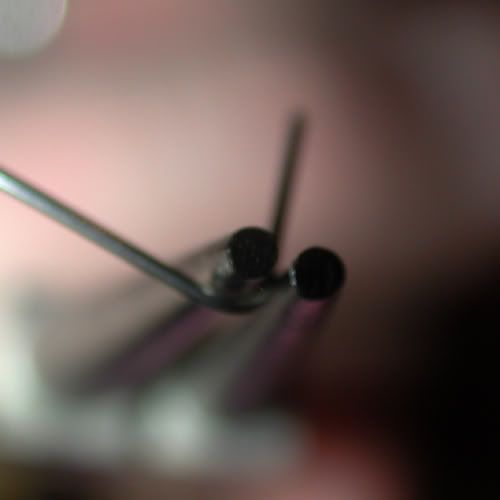
3. Change the pliers’ grip to the outside of the loop instead of the inside
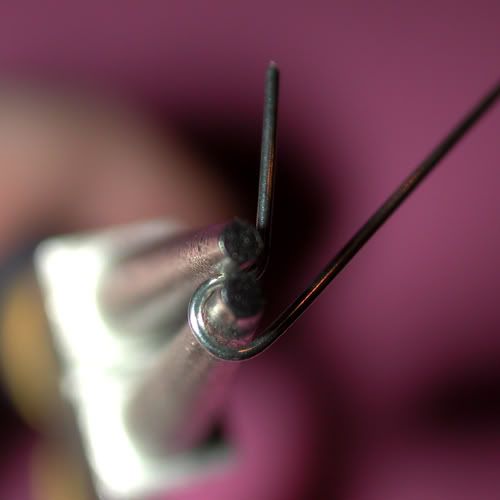
4. Twist the short end around the wire to form a “noose,” twisting away from the noose
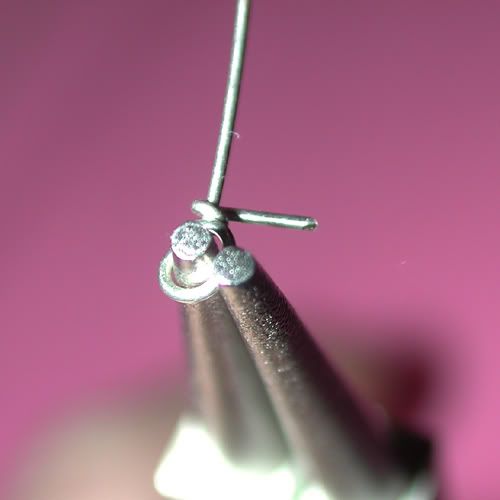
5. Use the bent pliers to crimp the edge in (apologies for the lack of picture for this step, because it takes two hands to hold both pliers and I couldn't find the tripod for the camera)
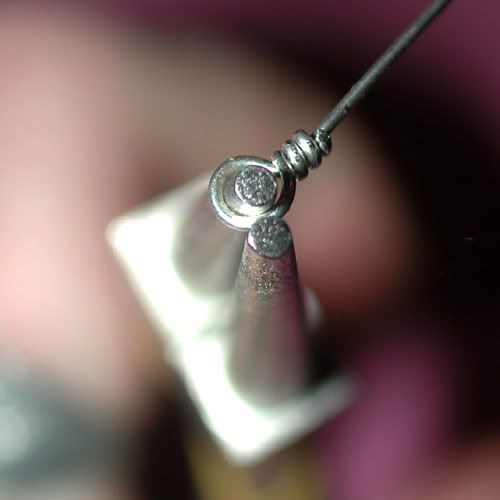
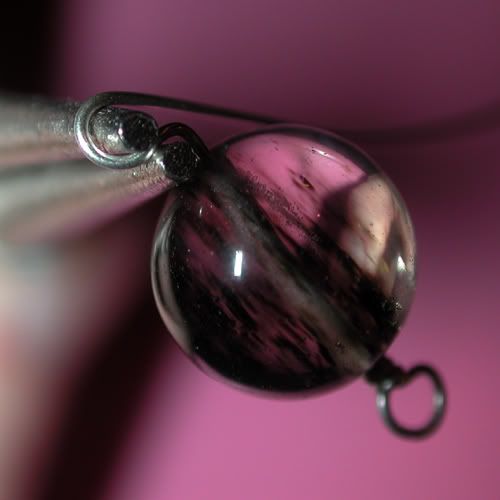
6. Add bead
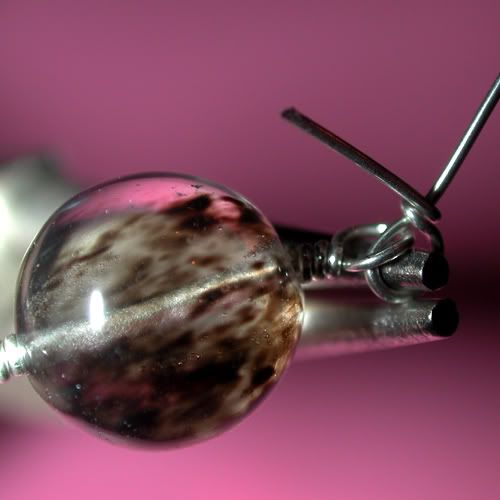
7. Grip the wire again with the round-tipped pliers just above the bead and bend to form another 90 degree angle.
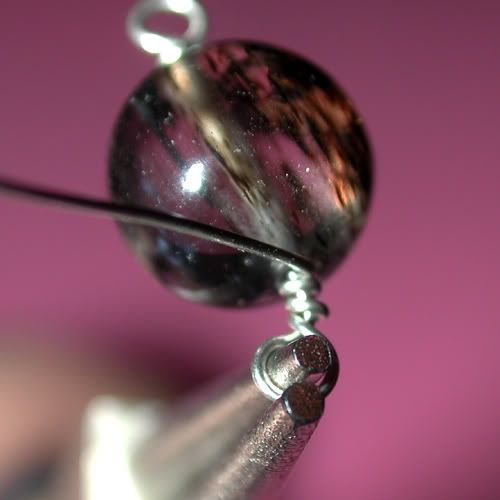
8. Wrap the wire around the top prong of the pliers, forming another loop.
9. Change the pliers’ grip to the outside of the loop instead of the inside
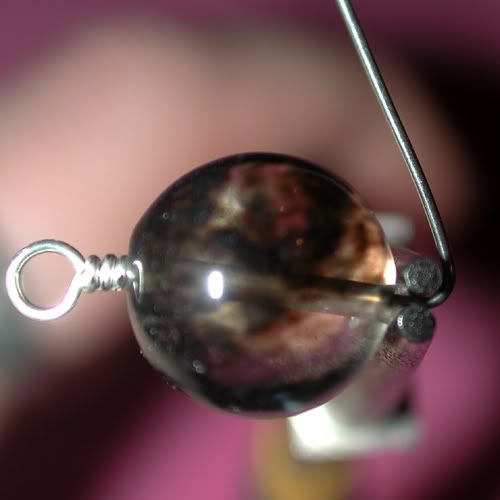
10. Twist the end around the wire to form a second “noose,” twisting towards the bead.
11. Cut the wire as close as possible with the wire cutters
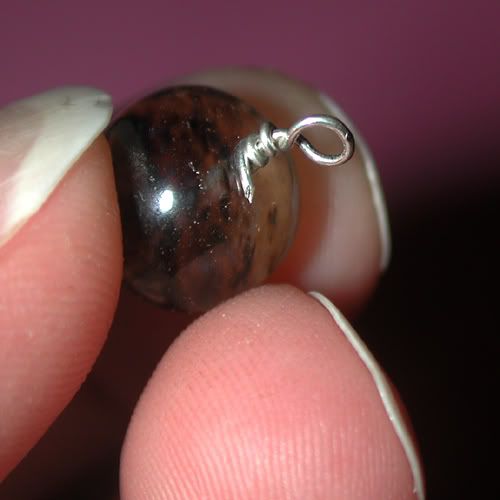
12. Use the bent pliers to crimp the edge in
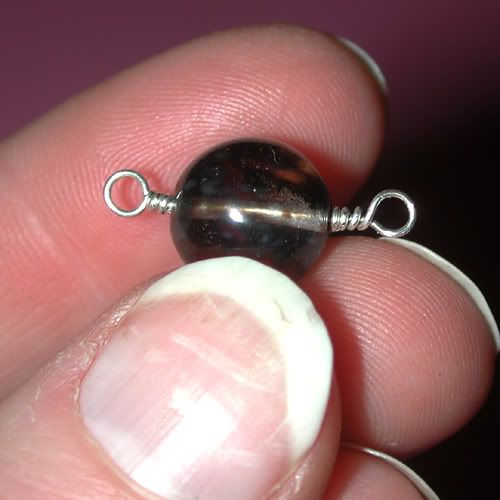
If stringing beads together, or if combining welded chain and wrapped beads, when you start wrapping the next bead, make sure to slide the noose from the previous bead or the end of the chain into the loop before twisting it closed


21 comments:
Thanks, db. Will look again later.
Great Job!
Love it!
Fantastic tut, thanks db!
This is very helpful.
Super up close details to help make the closed loops. Thanks! Now what I'd like is a tutorial on the birdsnest ring. do you know of any? It looks easy and there are so many that make it. But it still looks so pretty.
UxCritter - Sorry, that one I don't know, but I'm sure they're out there. Maybe if you asked on the Etsy forums, someone would oblige?
Thanks, this is great. I just started wire wrapping and always like to learn more.
http://KayzKreationz.etsy.com
good job victoria. i am always amazed at the many ways of wire wrapping a bead link. I also make jewelry but my technique for a gallery wrap like you have shown is quite different. thanks for showing an alternative way.
mistycritter - I'd love to see your technique, if you ever do a tutorial!
great to see this soooo up close...I need to try this method b/c I know I sure would save myself some headaches. Thanks!!
cool
Hopefully in the new year after the all the Holiday craziness dies down I can do a tutorial on my technique on my blog http://mistyridgedesigns.blogspot.com
i hope to get back to my blogging on a much more regular schedule then.
your pictures are exquisite!!!
Great job Victoria!
Great job! Love the detail in the photos!
just awesome!
Very simple and easy to understand instructions, and I loved the close-up photography. Great job!
thank you so mutch
You make it look so easy! I've been wondering how to do this for a very long time. Thanks!
Very nice Blog! I've always been interested in wire wrapping,but my mom says I'm backwards at everything I do since I'm left handed. lol
I am printing this to see what I can do. Thank you for the up close pics too.
This is terrific, Victoria!
Thank you so much for the great tutorial!
nice wrappin'!
Post a Comment