Showing posts with label sewing. Show all posts

Monday, November 11, 2013

Our Dragon Banner

I realized looking at the pictures from my previous post that I'd never talked about this year's big embroidery project here.  We ended up not camping out for faire this year, as it was right after we got back from New Orleans and we'd had our fill of being overly warm for the summer, so we day-tripped it instead, and so I didn't get to use the banner I'd made for our campsite.  Next year.  But here it is - I based it on a drawing my daughter did in art class, a serpentine dragon.  Oops!  Just realized I need a picture of the drawing!  But anyways, I traced it onto some cloth and then spent somewhere between 20-30 hours filling it in.

In progress shots:

dragon-device-1

dragon-device-2

dragon-device-3

I then finished the edges with some ribbon:

dragon-device-4

And then backed it on blue satin:

dragon-device-5

Husband has promised me a fancy painted stick on which it will hang, which will hopefully happen before next year's faire, because we will camp out next year so I can show this off, dagnammit!


...

Friday, February 4, 2011

The Great Sewing Room Reclamation of 2011

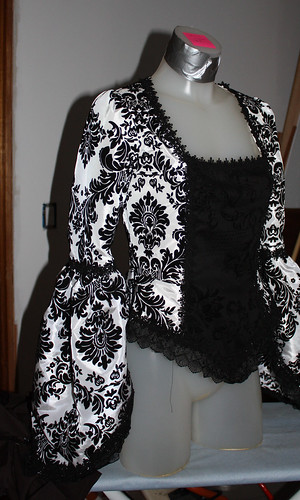
I think any costumer has a clutter problem, but mine had gotten completely out of control.

I'm supposed to be working on a 12 costumes in 12 months project, but things haven't been going that well, and it was mainly because I'd accumulated so much in the sewing room that I practically couldn't walk through the room anymore. I was well on my way to being a feature on Hoarders in a couple years if I kept up like this. I actually broke my streak of not ever, for any reason, watching reality TV and sitting down for a couple of episodes of this show before I started, looking for hints and a little psychological prep.

The thing that caught me about the people on the show is how they all talked about how embarrassed they were by the mess and clutter, but how helpless they felt to deal with it. I just had one room to deal with and I still took over a month from start to finish. Imagine having a whole house to deal with! Part of me doesn't want to show what it looked like to begin with, but that's part of the process for me, a visual, public record of how I let things get to hopefully give me the impetus to never get to that point again.

So, here's before, during and after pictures of the cleaning, organizing and weeding.

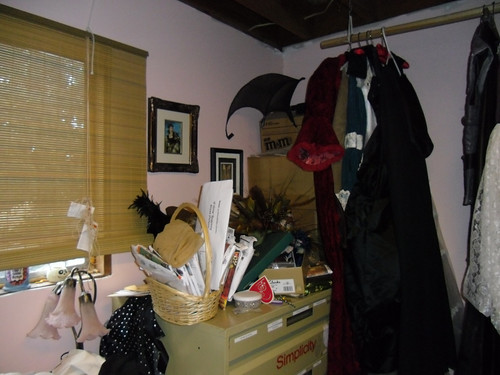
First, there's the costume bar, a long dowel that the husband hung from the ceiling for me. There were boxes piled up underneath it and a lot of things that were just piled on top of the boxes instead of being hung. I didn't take an initial picture of this, but here's the empty space after taking out the boxes:

clean up 1

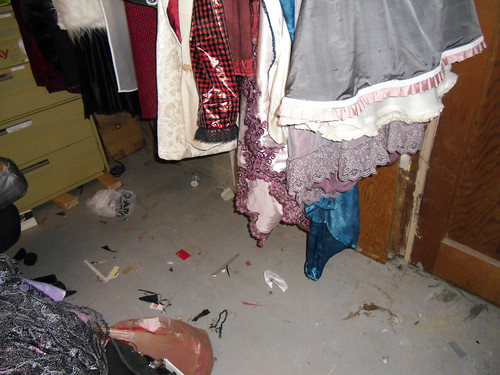
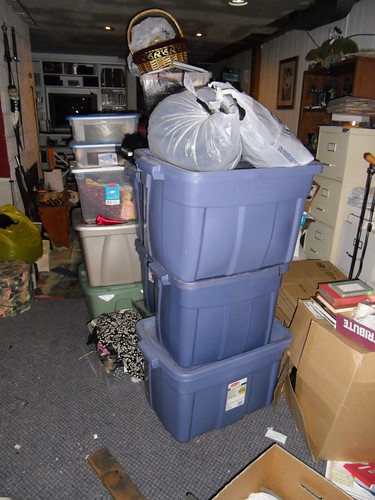
Here's what was piled underneath:

clean up 2

And here's how it looks today:

clean up 21

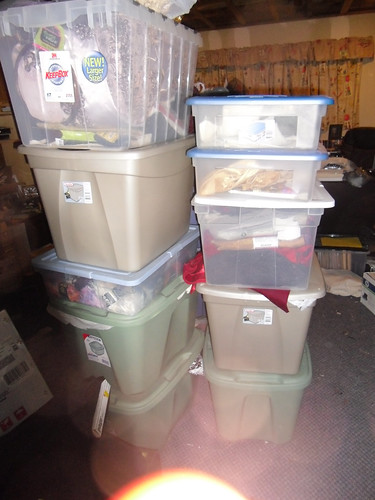
I've got a set of wooden IKEA shelves to the left of my sewing counter, and here's how they looked before, with totes spilling out to a double-deep stack at the end of the racking:

clean up 4

And here's how it looks now, everything on the shelf, and the stack on the end gone:

clean up 19

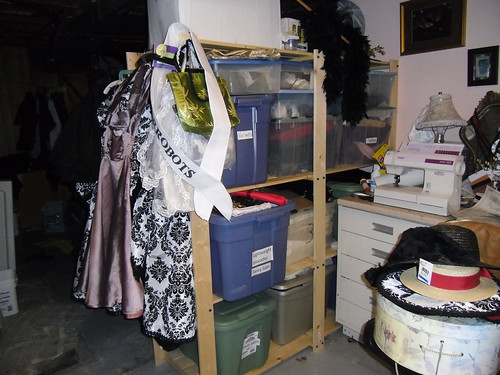
(and yes, I did label each of the totes as to what kind of fabric is inside)


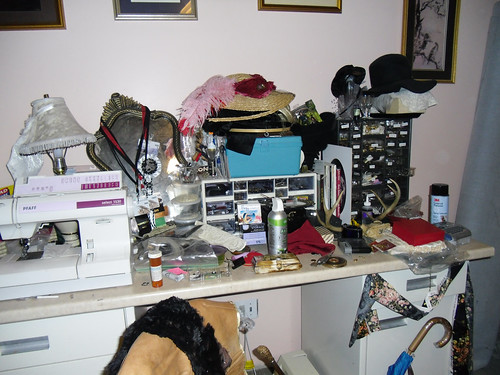
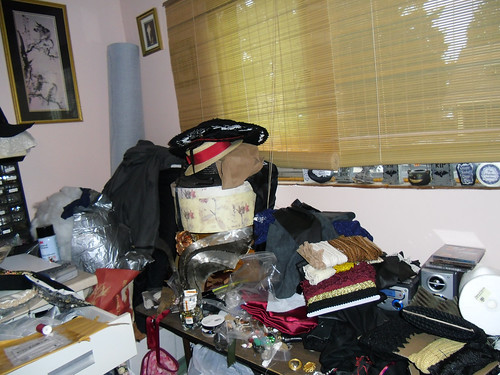
My sewing counter, cluttered up with little bits and bobs:

clean up 10

Now, with all those bits and bobs either gone away or put away, I have a flat surface to spread pattern instructions on. It's not perfect, but I might even be able to clear enough space to put out my serger:

clean up 20

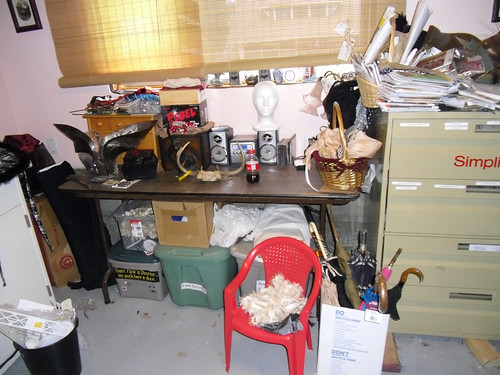
My work table, on which I do smaller detail work and cut out small pattern pieces (the larger ones are pinned and cut all spread out on the living room floor, usually):

clean up 5

clean up 3

clean up 6

Now it looks like this:

clean up 22

And all that stuff that was on the table is now here:

clean up 13

clean up 12

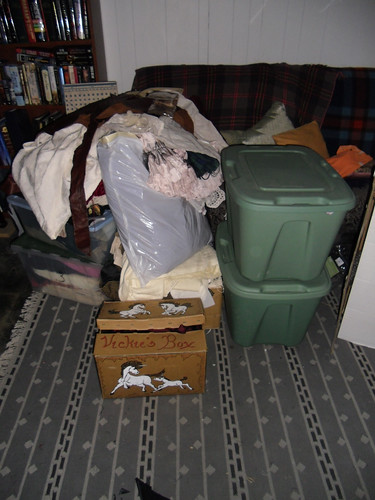
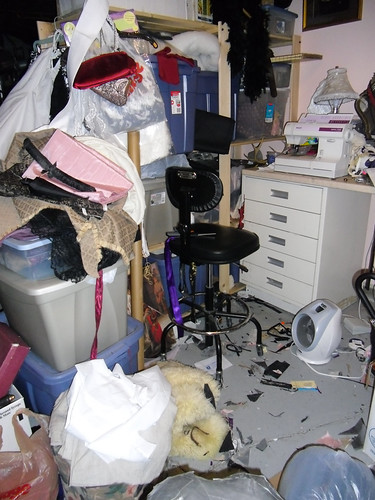
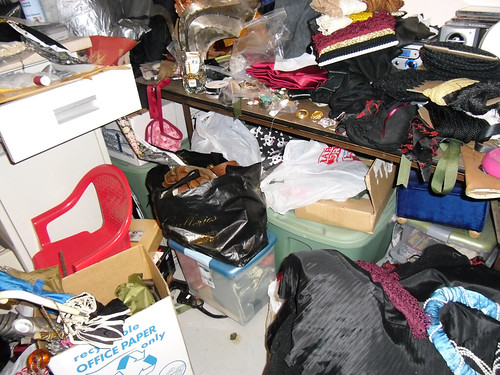
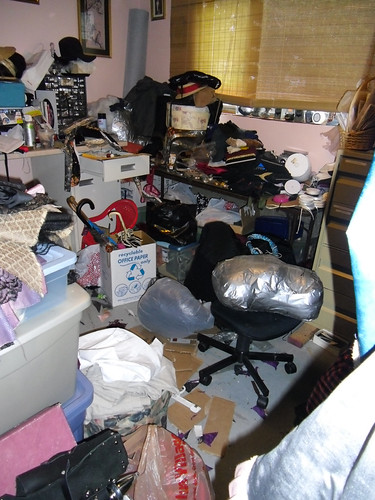
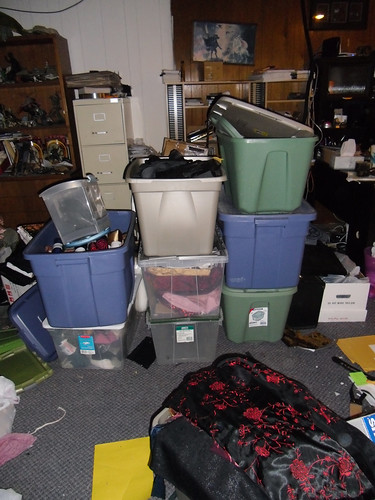
The in-between of all these pictures? It was me making the basement totally impassable for about 3 weeks while I bit by bit sorted through everything I had taken out of my sewing room and did some serious weeding. Here's everything I'd somehow managed to cram into that room:

clean up 14

clean up 15

clean up 16

clean up 17

I sorted through each tote, made piles by fabric types, and started stacks of things to get rid of. As I emptied a bin, it became home for one of the stacks. The goal was to have one tote per fabric type. I mostly succeeded. And I did weed out three totes full of fabric, plus five boxes of clothes.

The only spot that hasn't been cleaned, and that is actually worse than when I started is the top of my pattern cabinet:

clean up 7

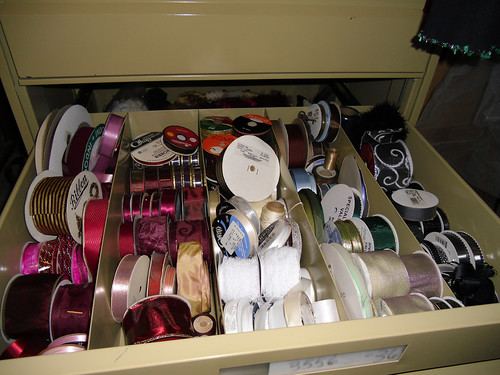
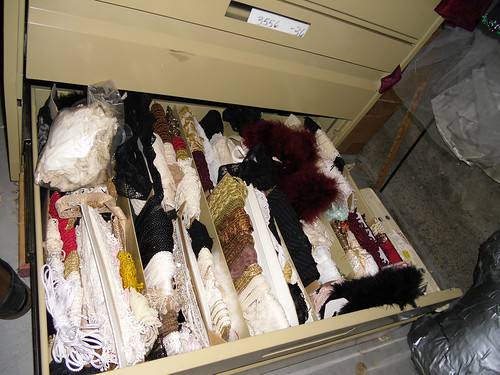
I need to reorganize and weed the patterns, plus I have a pile of random pattern pieces that didn't get put back into their envelopes when I was done with them. But my room is workable again, and I am going to do my damnedest to keep it that way.

Tuesday, September 28, 2010

Saving a corset

Hey, there. I said I was going to do 12 costumes in 12 months, didn't I? Time to start working on that then, as the first month is already pretty much shot. At least I didn't say it was going to be one costume a month, so I can play catch up and still stay on track.

A couple of years at a clothing swap***, I acquired a red satin underbust corset. It's not a particularly well-made one, I have to say, as there doesn't seem to be much of a strength layer, and the quality of the satin is not high, but hey, it's free! The maker didn't reinforce the boning channels with anything, and the tips of the bones had worn through the fabric. But, hey, I can sew and I can fix it, right? Yeah, right. It sat around for a couple of years, and I almost put it in the "go away" boxes a couple of weeks ago, but then I decided I was finally going to get off my lazy dignity and do something about it.

I am ashamed of how long it sat around, because it only took me a couple hours each over the course of two Mondays to finish it. I of course didn't take pictures beforehand, but here's what it looked like after I picked off the binding last Monday:

corset reclamation project 1

As mentioned previously, the bones were sticking through the fabric in four places:

corset reclamation project 2

I wasn't even going to try to match the red. What goes good with red, though? Why, black of course! I found a 3/4 yard piece of black satin in the remnant bin and reinforced it with heavy iron-on interfacing, then cut it into strips, giving myself a 3/8" seam allowance on either side.

corset reclamation project 3

Yes, one of the strips is slightly wider than all the rest, proving again how entirely straight-line challenged I am. I am Special! Yeah, that's it.

No in progress pictures past this point, as I got too far into the groove, but here's the finished piece, sans the final ironing I should have done once I finished with the biding.

corset reclamation project 4

corset reclamation project 5

I acquired the skirt shown here at the same time, and will be adding a drapey black layer to it, to help mask that they aren't quite the same shade of red under certain lights.

***Hey, some of you may be wondering "What on Earth is a clothing swap?" It's a pretty fun way to recycle your wardrobe. You and a bunch of friends go through your closets and dressers and pull out the stuff you haven't worn in ages, that is now either too small or too big, that you now wonder "Oh, ye gods, what was I thinking when I bought that?!?" and anything else you just don't want anymore, and converge on one person's house, preferably a house with at least one good full-length mirror.

You all dump your bags of clothing out in the middle of the floor and all go rummaging through it looking for stuff that will fit you that you will wear. Bring munchies and a bottle of something and it turns into a fun party. Anything left unclaimed at the end gets bagged up and taken to a thrift store.

Wednesday, September 1, 2010

On to the next project!

So what does a body do when they finish up a year-long blogging project? Why start up another one, of course!

I've been costuming for over 20 years, and up until about 7-8 years ago, it was all with thrift store finds that I hand altered. But then a friend of mine gave me my first sewing lessons, and a monster was born. I bought a machine and started making my outfits from scratch.


The Ivory Maiden Gown by *dbvictoria on deviantART

me

So I decided my next project will be 12 costumes in 12 months.

First priority will be outfits for this year's Steamcon, followed by Norwescon, and I WILL enter the masquerade this year. (Plus, Patricia McKillip is the author guest of honor! Squeeeee! Which books to get autographed....?) And then to wind up the year, maybe a new outfit or two for the Washington Midsummer Renaissance Faire. I may even break down and attempt something Elizabethan, although I've never liked the period. But you learn a lot working outside your comfort zone, and it would be a challenge for me.

Sunday, August 22, 2010

A year in the making, day 355

What a wonderful weekend! Yesterday was the husband's birthday (mine is next Wednesday), and another friend of ours has her birthday on the 24th. She decided she wanted to celebrate her birthday by helping clear invasive species from one of our local parks, so we spent 4 hours yesterday hacking down and ripping out blackberries. Rough work, and I found out how woefully out of shape I was! But we cleared about 1000 square feet of blackberry brambles, and also policed an area that had been previously cleared looking for new growth and rooting it out.

And today we went to a 6-year-old birthday party, for a daughter of friends of ours. There was a ninja pinata!

Ninja pinata

He was soundly beaten and looted:

Bob's head

Flying limbs

The birthday girl's current favorite color is red, so I made her a cloak out of red corduroy:

Red cape

What birthday party would be complete without doggie kisses?


Good dog by *dbvictoria on deviantART

The weather stayed beautiful, despite some threatening-looking clouds.


Cumulous Clouds by *dbvictoria on deviantART

And now I am faced with a decision - do we have sandwiches with the leftover pork steaks from last night, or with the grilled chicken from the night before? Hmmmmm. My belly is a'rumbling, so I'll have to make my mind up soon.

Tuesday, July 20, 2010

Sneak peak

Here's the fabric I'm using for my dress in progress:

Cute Smiley Skulls

I've got the pieces out and should be able to get the sewing done tomorrow. Stay tuned!

Sunday, June 27, 2010

A Year in the Making, day 296

It's been a busy weekend - I had two social events on Friday, a promo photoshoot for Steamcon and a movie viewing party on Saturday, and today was Pride Parade!

For one of Friday's gatherings I made what I call my Lemon Dream Cake:

lemon dream cake

It's always a favorite.

I finished the dress for the parade Friday night, and made a hat from scratch to match. I've made one other hat from scratch, but that was with a pattern. This time I completely winged it, with the aid of a pre-made piece I picked up ages ago at Display and Costume. I still had buckram left over from my previous project, and used scraps from the dress-making for the fabric.

I started off using a hat I reworked for my daughter for the basic shape:

Hat Making

I did a double thickness for the brim, for stiffness:

Hat Making

Traced out the crown for the opening on the brim pieces:

Hat Making

Cut out the circle for the crown and tabbed it:

Hat Making

Traced out the top of the crown - the outer border is the seam allowance. Neglected to take a picture, but this piece was tabbed too after I cut it out.

Hat Making

The assembled buckram framework:

Hat Making

The line you see around the brim is aluminum wire tacked on for stiffness, to keep the shape of the brim.

Hat Making

Here's the underside:

Hat Making

The fabric was tabbed also, and sewn on:

Hat Making

Hat Making

I made a band of the contrast fabric from the gown for around the crown:

Hat Making

Here's where I stopped taking pictures because I was running out of time. Some black cotton was used for lining, and the edges finished around the inside of the crown and around the rim of the brim with black bias tape, and then I finished it with daisy gimp:

Hat Making

Hat Making

And here's a shot of me in the dress and hat, and the necklace which inspired the gown, from today's Pride Parade in downtown Seattle - unfortunately I blinked.

me

Tuesday, June 22, 2010

A year in the making, day 292

A few pictures accumulated in the camera, but I neglected to download them yesterday.

To start off, a picture of Sunday's dinner, the savory bread pudding:

Savory Bread Pudding

It was quite tasty, let me tell you.

And more tastiness was made yesterday, a new batch of jam, with strawberries, cherries, and peaches:

Cherry Peach Strawberry Jam

Yesterday, I also cut out the pieces for a new dress for myself. Ever since I received this necklace, I've been thinking I needed a spectacular dress with which to showcase it. I had some black on black fabric already, and when I went in search of a contrasting fabric for it, I found this wonderful white taffeta with a black velvet pattern:

Black and White dress

The dress I'm making with it is McCall's M6097. For some reason, they have this labeled as a "Victorian" pattern.

...

*blinkblink*

...


Ooooooookay. I guess maybe because the back has a bustle? Even though the naming boggles the brain, it's still a lovely dress, and it's not the pattern's fault someone labeled it so ridiculously.

All the fabric got cut out yesterday, and I got the bodice together today. It's being modeled by Phyllis, my new dress form:

Black and White dress

Black and White dress

Tomorrow I'll tackle the skirt. Tomorrow afternoon, that is. Late tomorrow afternoon, most likely. I have a lunch date with a friend and a strawberry margarita.